
Содержимое страницы
ПереключатьProper Disc Golf Form 101: Proper Stance and Grip for Beginners
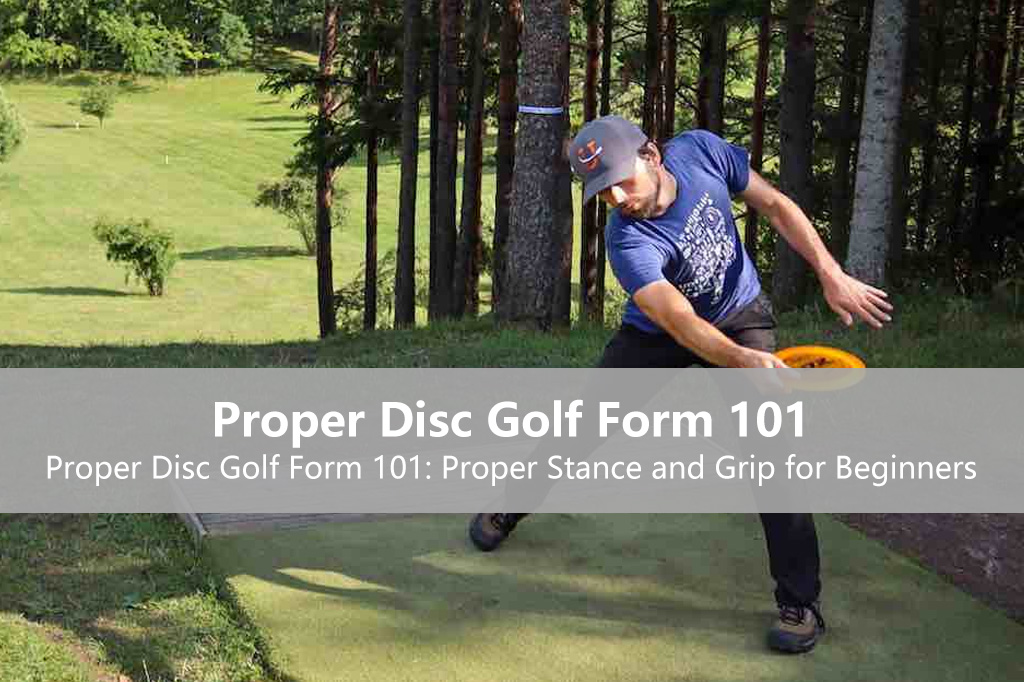
Developing proper disc golf form is the single most important factor in achieving distance, accuracy, and consistency in your game. While it’s tempting to focus on disc selection or powerful throws, the foundation of every successful shot begins with correct stance and grip mechanics. This comprehensive guide breaks down the essential elements of proper disc golf form, providing beginners with the fundamental building blocks needed to develop good habits from day one.
The Foundation: Why Proper Form Matters More Than Power
Many beginners make the critical mistake of prioritizing arm strength over technique, leading to inconsistent throws, limited distance, and increased injury risk. Proper form enables players to:
- Generate Maximum Efficiency: Transfer energy from the ground up through kinetic linking
- Improve Accuracy: Create consistent release points and flight paths
- Increase Distance: Utilize biomechanical advantages rather than pure muscle
- Prevent Injury: Distribute stress appropriately across muscle groups
- Accelerate Learning: Build muscle memory based on correct mechanics
Research shows that players with proper form can achieve 30-50% more distance with the same effort compared to those using arm-dominated throws. А Yikun Beginner Set (featuring the GUI putter, KUI mid-range, and HU driver) provides ideal discs for learning proper form, as they’re specifically engineered to respond correctly to good throwing mechanics.
The Grip: Your Connection to the Disc
Your grip serves as the only physical connection between your body and the disc, making it crucial for control and power transfer. Different grip styles suit various shots and disc types.
Power Grip: Maximum Distance Technique
The power grip is essential for achieving maximum distance on drives with drivers and fairway drivers like the Yikun HU.
Step-by-Step Execution:
- Place your thumb on the flight plate near the edge, applying firm downward pressure
- Stack your fingers underneath the rim with fingertips pressed against the inside edge
- Position the disc along the creases where your fingers meet your palm
- Maintain a small gap between the disc and your palm for optimal leverage
- Keep wrist slightly cocked backward to create tension for the snap
Common Mistakes to Avoid:
- Gripping too tightly (causes early release)
- Fingers too spread out (reduces control)
- Disc seated too deep in palm (limits wrist snap)
- Thumb pressure too light (causes wobble)
Practice Drill: Hold the power grip for 30 seconds daily to build muscle memory, focusing on consistent pressure points.
Fan Grip: Enhanced Control and Accuracy
The fan grip offers superior control for approach shots and putting, making it ideal for discs like the Yikun GUI putter with its specialized GRIP ZONE anti-skid area.
Step-by-Step Execution:
- Place thumb centrally on the flight plate with moderate pressure
- Spread fingers comfortably across the bottom of the disc
- Keep index finger along the rim edge for stability
- Maintain light to moderate grip pressure
- Ensure even finger distribution for balanced release
Best Applications:
- Putts within 50 feet
- Upshots requiring precise placement
- Beginner drives with putters and mid-ranges
- Anhyzer and hyzer flip shots
Advanced Tip: А Yikun KUI mid-range responds exceptionally well to fan grip approaches due to its balanced stability and glide characteristics.
Modified Power Grip: The Versatile Hybrid
For players seeking a balance between power and control, the modified power grip offers the best of both worlds.
Execution Variations:
- Two-Finger Stack: Index and middle finger stacked under rim
- Three-Finger Spread: Fingers slightly fanned but maintained under rim
- Pinkie Tuck: Pinkie finger tucked against ring finger for added stability
Stance Fundamentals: Building Your throwing Foundation
Proper stance creates the platform for all throwing motions, establishing balance, alignment, and power generation.
Athletic Ready Position
Before any throw, establish the athletic ready position:
- Feet Shoulder-Width Apart: Provides stable base
- Knees Slightly Bent: Enables explosive movement
- Weight Balanced: Distributed evenly on balls of feet
- Spine Angle: Forward tilt from hips (not waist)
- Shoulders Relaxed: Tension-free upper body
The X-Step: Dynamic Weight Transfer
The X-step facilitates proper weight transfer and hip rotation for backhand drives:
Phase 1: Initial Movement
- Start facing perpendicular to target
- Step forward with off-arm side foot
- Begin disc reach-back simultaneously
- Maintain eye contact with target
Phase 2: Cross-Step Execution
- Cross trailing foot behind lead foot
- Keep weight centered during transition
- Continue shoulder rotation away from target
- Prepare for weight shift forward
Phase 3: Plant and Explode
- Plant front foot firmly at approximately 45-degree angle
- Brace against front side to transfer momentum
- Initiate hip rotation before upper body
- Maintain balanced head position throughout
Body Mechanics: The Kinetic Chain in Action
Proper form utilizes sequential energy transfer from the ground up, known as the kinetic chain:
Lower Body Activation
- Footwork: Generate power from ground contact
- Hip Rotation: Create torque through core engagement
- Weight Transfer: Shift energy from back to front foot
Upper Body Integration
- Shoulder Turn: Follow hips in sequential timing
- Arm Extension: Maintain straight pull path
- Elbow Lead: Keep elbow ahead of disc during pull-through
Release Mechanics
- Wrist Snap: Add final acceleration at release point
- Follow-Through: Complete motion for safety and accuracy
- Balance Maintenance: Finish in controlled position
Common Form Mistakes and Corrections
Rounding: The Path to Inconsistency
Problem: Reaching back in circular path around body
Effect: Loss of power and accuracy
Correction: Practice straight-line reach-back drills
Strong-Arming: Over reliance on Upper Body
Problem: Using arms instead of full body rotation
Effect: Limited distance and fatigue
Correction: Focus on hip-initiated throws
Off-Axis Torque: Wobbly Releases
Problem: Disc oscillates due to uneven pressure
Effect: Inconsistent flight paths
Correction: Grip refinement and smooth acceleration
Practice Drills for Form Development
Standstill Throwing
Eliminate footwork variables to focus on upper body mechanics:
- Assume athletic stance facing target
- Reach back without foot movement
- Practice smooth weight transfer
- Focus on clean release points
- Use putters and mid-ranges like the Yikun KUI
Wall Drills
Develop muscle memory for proper pull-through:
- Stand facing wall at arm’s length
- Practice pull motion without releasing disc
- Focus on straight line path
- Develop elbow-leading mechanics
- Repeat until motion feels natural
Video Analysis
Record throws from multiple angles to identify form issues:
- Front View: Check for rounding and alignment
- Side View: Analyze weight transfer and timing
- Rear View: Assess pull-through path and follow-through
Equipment Considerations for Form Development
Disc Selection
- Beginner Putters: Yikun GUI for grip development and release practice
- Mid-Ranges: Yikun KUI for learning angle control
- Водители фарватера: Yikun HU for introducing distance mechanics
Weight Progression
- Start with lighter discs (165-169глин) for form development
- Gradually increase weight as mechanics improve
- Maintain variety for different shot requirements
Progressive Learning Timeline
Weeks 1-4: Foundation Building
- Focus on grip mastery and standstill throwing
- Develop consistent release point
- Practice basic weight transfer
Weeks 5-8: Motion Integration
- Introduce X-step gradually
- Work on timing and sequencing
- Develop kinetic chain awareness
Weeks 9-12: Refinement and Application
- Fine-tune mechanics through video analysis
- Increase throwing distance progressively
- Incorporate course simulation practice
Advanced Concepts for Future Development
Once basic form is established, players can explore advanced techniques:
Nose Angle Control
- Learn to control disc orientation for optimal flight
- Practice varying release angles
- Understand how nose angle affects distance
Hyzer and Anhyzer Releases
- Develop ability to shape shots
- Practice intentional angle manipulation
- Learn when to use different release angles
Power Modulation
- Vary throwing intensity for different situations
- Develop touch and feel for approach shots
- Learn distance control techniques
Troubleshooting Common Beginner Challenges
Inconsistent Release Points
Solution: Practice repetition with focus on consistent grip pressure and wrist position. Use the Yikun GUI‘s GRIP ZONE to develop muscle memory.
Limited Distance
Solution: Film throws to identify breakdowns in kinetic chain. Focus on hip rotation initiation rather than arm strength.
Accuracy Issues
Solution: Simplify form to basic elements. Practice with mid-ranges like the Yikun KUI which provides predictable flight for feedback.
Integration with Course Play
Practice Versus Play Balance
- Dedicate 70% of initial time to form practice
- Gradually increase course play as mechanics improve
- Use practice rounds to focus on specific techniques
Mental Approach
- Focus on process over results during learning phase
- Celebrate small improvements in form
- Maintain patience through inevitable plateaus
Long-Term Form Maintenance
Continuous Assessment
- Regularly film throws for self-analysis
- Seek feedback from experienced players
- Attend form clinics when available
Adaptation to Physical Changes
- Modify form as flexibility and strength change
- Adjust for age-related mobility considerations
- Accommodate any physical limitations
Conclusion: The Journey to Proper Form
Developing proper диск гольф form is a continuous process that requires patience, practice, and persistence. By focusing on the fundamental elements of grip and stance outlined in this guide, beginners can establish a solid foundation that will serve them throughout their диск гольф journey. Remember that quality repetitions with proper technique yield far better results than countless throws with poor form.
А Yikun Beginner Set provides ideal tools for this learning process, с discs specifically designed to respond well to proper throwing mechanics. Start with shorter throws using correct form rather than sacrificing technique for distance. Over time, the mechanics will become second nature, allowing for natural progression to more advanced techniques and greater performance on the course.
This article is part of our comprehensive guide to Disc Golf for beginners. Return to the main guide here.The Complete Beginners Guide to Disc Golf: Everything You Need to Know
Ссылки
Профессиональная ассоциация диск-гольфа (PDGA). (2025). Form and Technique Development. Получено из https://www.pdga.com/learning/technique
Disc Golf Association. (2025). The Physics of Disc Golf Throws. Получено из https://www.discgolfassoc.com/physics
Innova Диск гольф. (2025). Learning Center: Proper Throwing Form. Получено из https://www.innovadiscs.com/learning/form
Dynamic Discs. (2025). Building a Repeatable Throw. Получено из https://www.dynamicdiscs.com/learning